I gotta be honest. I’ve been trying really hard not to include a whole lot of product mentions in my posts. I know that you don’t come here to read about my products, and I get it. You want to read new ideas for teaching music, as you should! However, (you knew that was coming didn’t you?) a big chunk of my life has been consumed recently with an enormous update to my store. It even spilled over onto the blog (as evidenced by the new design). And while my intent is not to talk solely about any of my products today, I do need to mention them briefly in order to give you an idea of how to use your treats. Please don’t hate hold it against me. Here we go…
Today I’m sharing a free sampler from my interactive notebook bundle (the project that’s been consuming me lately), along with ideas on how to use each page of the sampler. I purposely chose pieces that could stand alone and that could be used with a variety of grade levels in a variety of situations. To download the entire sampler from my store, click HERE or on any of the images below.
The Lines and Spaces page is one of my favorites because of its simplicity. Have you ever heard of students pretending their faces are noteheads and using their arms to represent the staff lines? Well, I used that concept as inspiration for this page. Simple, but effective.
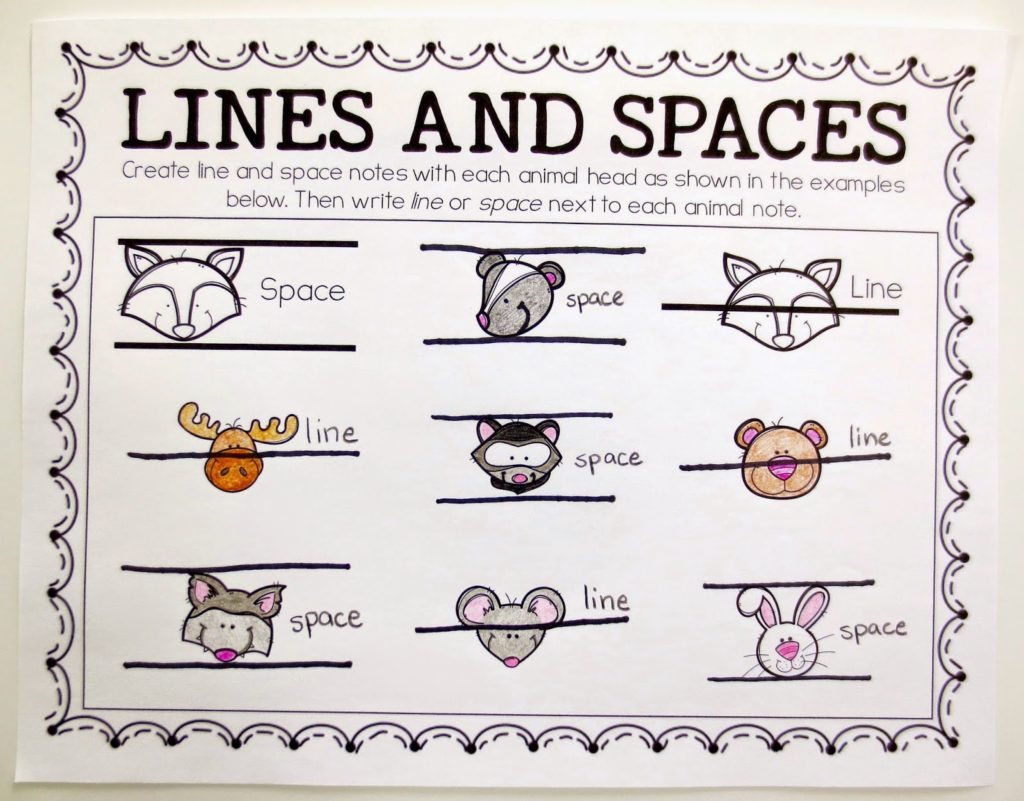 |
| Animal graphics by Krista Wallden and Kelly B’s Clipart |
As you may already know, I’m a huge fan of vocal exploration for elementary students. In the page below, students can draw their own vocal exploration and then sing it for their teacher or classmate. Turn this into a quick and easy bulletin board by asking your students to color in the graphics. The title of the bulletin board could be “Buzzing High and Low, Making Pitches Grow”. Okay, that’s terrible, so I’ll let you come up with a better one. Either way, it’s a great chance to showcase the musical compositions of even your youngest students.
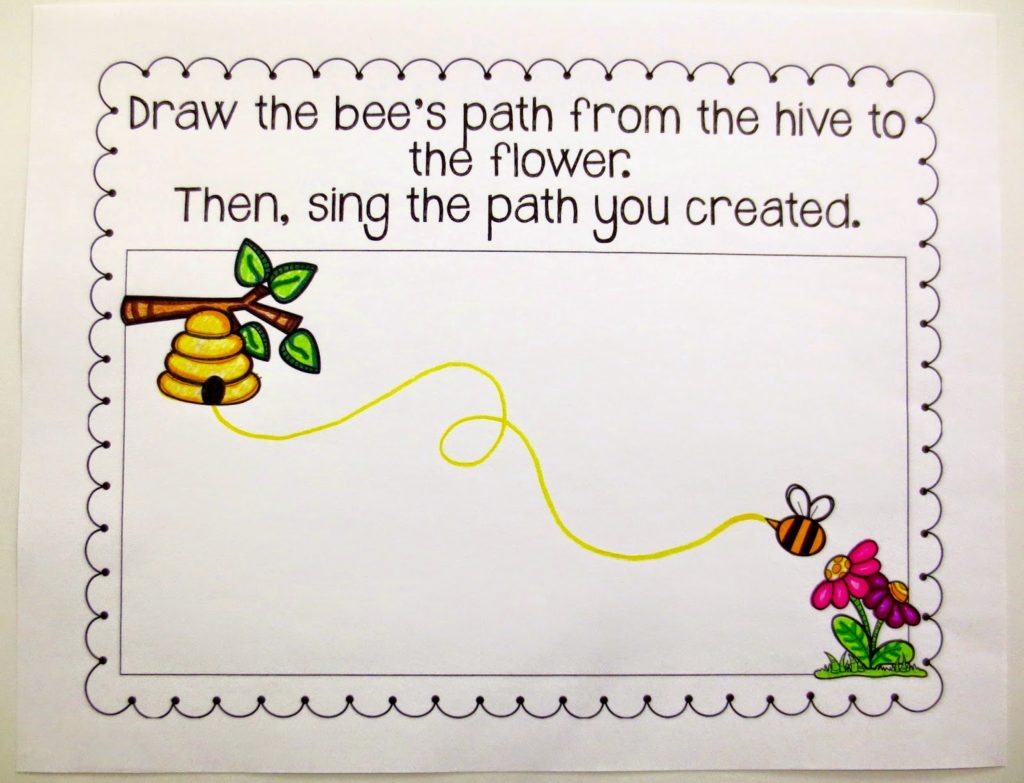 |
| Graphics by Krista Wallden and Kelly B’s Clipart |
Transferring notes to the staff can be a tricky process for kids. It involves several steps and requires students to have a solid understanding of rhythm, pitch, lines, and spaces. The (incomplete) example below shows a do clef, but you could easily use this with any clef you want. The rhythms are simple, which gives students a chance to focus on transferring the melody to the staff.
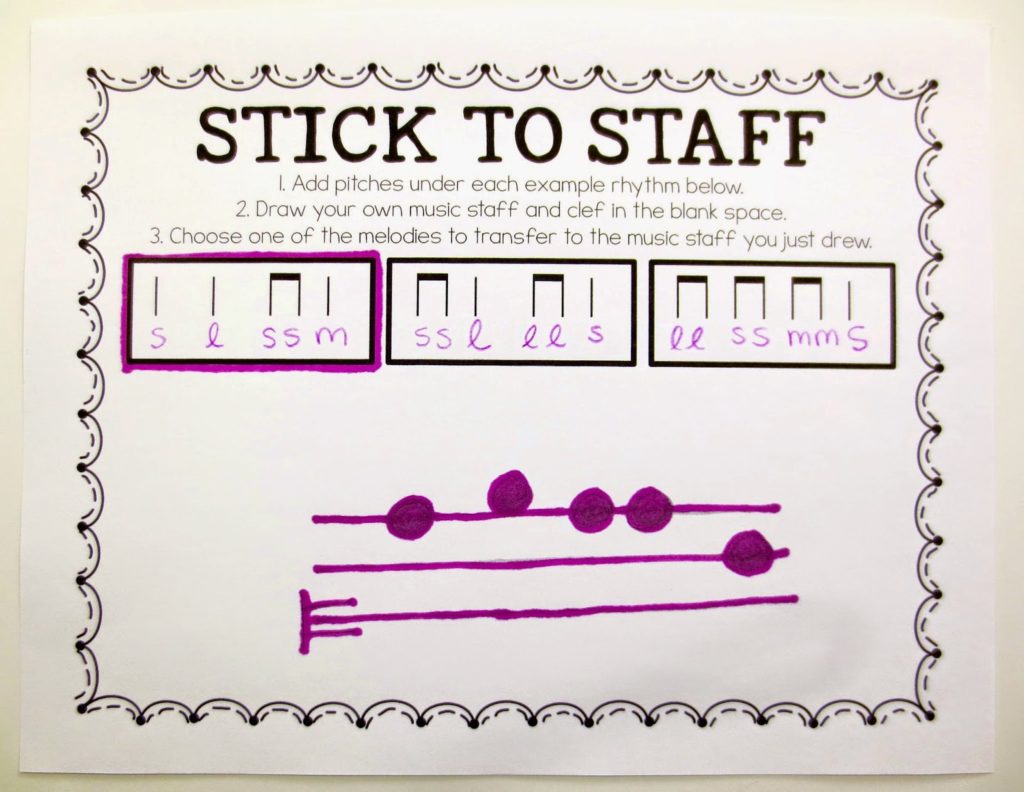 |
| Graphics by Kelly B’s Clipart |
This next page is a good example of one that you can customize depending on the concept you’re teaching. The directions are to lightly draw a shape (such as a heart) with pencil. Then, fill it in with music symbols using marker. Once finished, erase the original shape and you’re left with a shape consisting entirely of music symbols. The example below shows the shape filled in with accidentals, but you could use any note or symbol in which your students need extra practice writing.
 |
| Graphics by Lindy du Plessis |
Rolling melodies requires some dice. You can steal some from your board games at home (we are board game fanatics, so we always have plenty) or you could order some colorful, foam dice from HERE. To play, students simply roll a die and use the chart to write down the corresponding pitch. If they roll a 6, it’s considered a wild, and they can choose any pitch they want. The example below shows a melody in do pentatonic, but you could differentiate by asking some students to add simple rhythms to the pitches rather than transferring them to the staff.
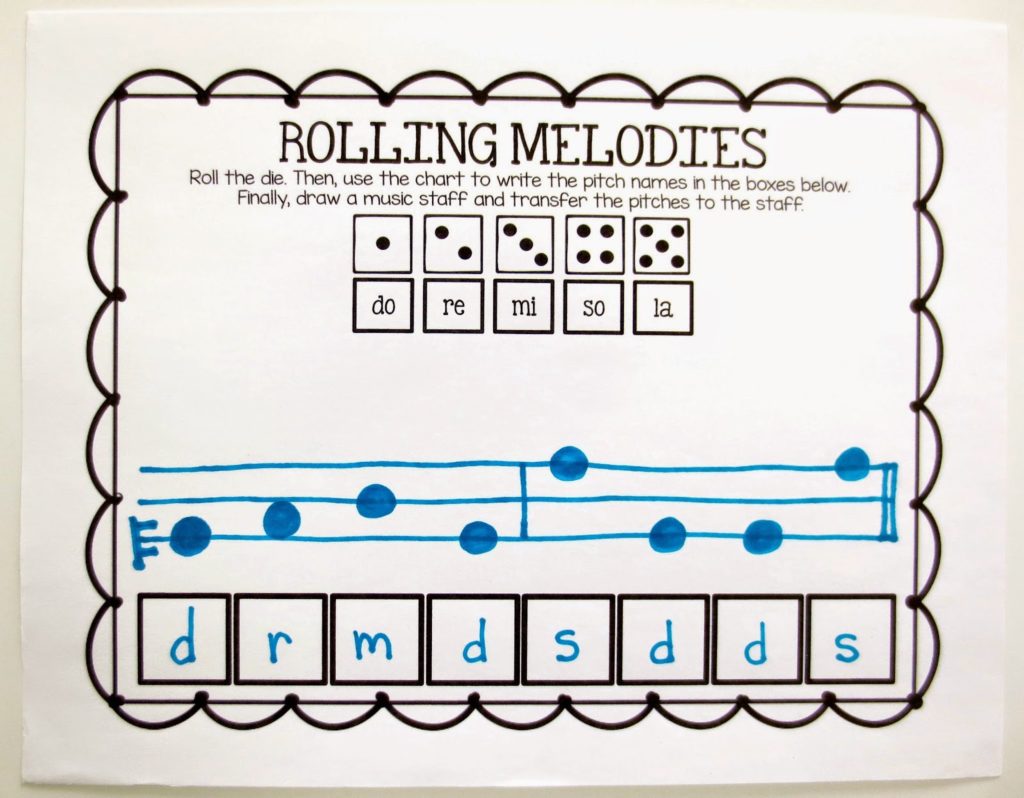 |
| Graphics by Krista Wallden and Kelly B’s Clipart |
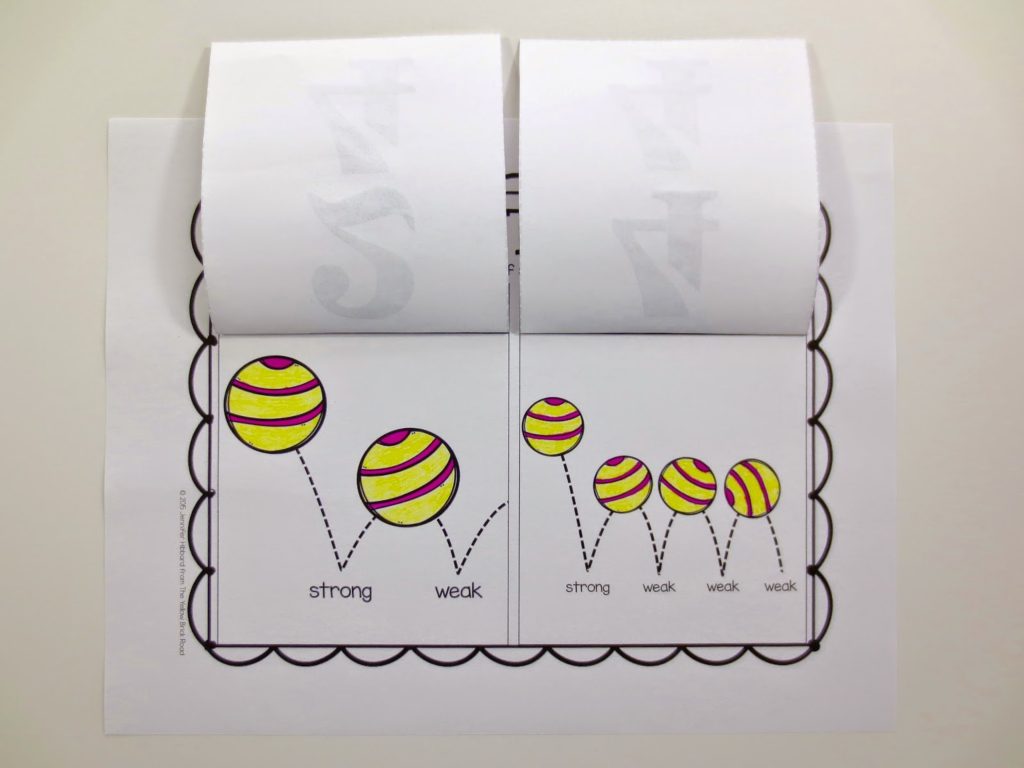
The syncopation page is an example of what I call the “information page” of an interactive notebook. It doesn’t require students to apply their knowledge but rather provides a good visual/explanation of the concept. The printable cut-outs shown below don’t come with this freebie, but you can ask students to divide each box and write in their own rhythms.
 |
| Graphics by Krista Wallden and Kelly B’s Clipart |
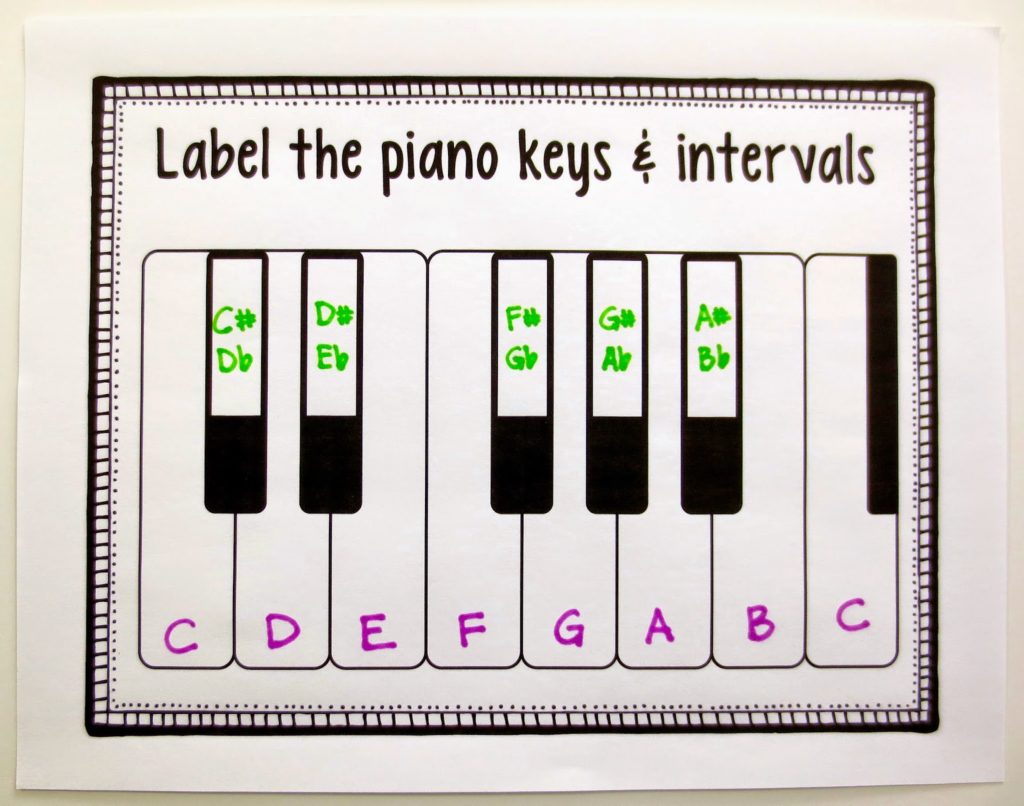
I wanted to make sure to add this page for my piano studio friends out there. It’s pretty self-explanatory and customizable. You can have the students label or not label the intervals, as in the example below. It’s completely up to you.
 |
| Graphics by Lindy du Plessis |
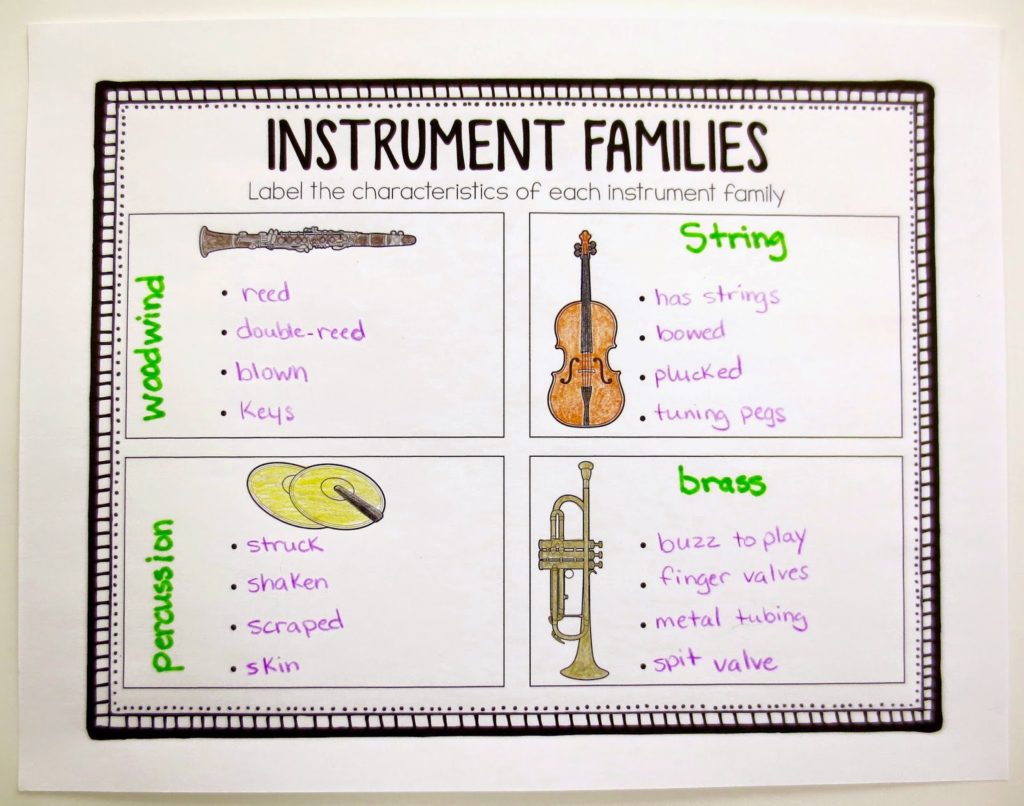
The Instrument Families page requires students to label the families as well as describe the characteristics of each. On a side-note, I hear a lot of debate about whether or not to include the keyboard family. Some don’t use it. Some do. What do you think?
 |
| Graphics by Dancing Crayon Designs and Lindy du Plessis |
 |
| Graphics by Kelly B’s Clipart |
6 Responses
Really appreciate the wide variety of interactive ideas that will help students make connections to the concepts across grade levels. I can't pick just one-love them all. Thank you for sharing!
You're welcome Christy! Thanks for taking the time to comment. I'm really glad you liked the pages I chose 🙂
Oh my goodness, this is amazing!! I already own the interactive notebook bundle but this post has me all excited to re-download and get all my updated goodness!! 🙂
Thanks Elizabeth! I added the previews to the bundles as well, which provides a lot of ideas 🙂
That's a wonderful share!! I'll use a couple of them as centers in the near future.
Shine on!
Kelley
Great idea! Thanks for commenting Kelley 🙂